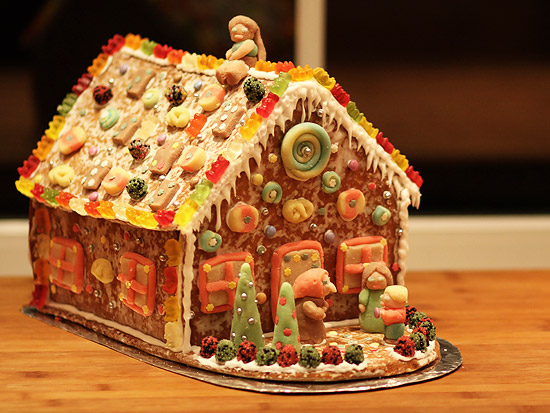
Today we will assemble and decorate the ginger bread house.
For the assembly we need
- one very fresh egg white
- about 200 g powdered sugar
- a piece of cardboard
- aluminum foil or plastic wrap
- toothpicks
- freezer bag
- scissors
- decorations (see suggestions below)
- if you can find them: two more helping hands
We will use sugar icing as glue. Beat the egg white and add powdered sugar, until it is a firm but sticky cream. You should see a line when you pull a knife through it. The frosting gets hard very quickly, if it has contact to air. Put it into the freezer bag immediately and close it with a knot.
It would be somewhat unhygienic to place the ginger bread house somewhere without protection. Wrap the cardboard with foil. You can cut the cardboard in shape so it won't overlap. Put the groundplate onto it.

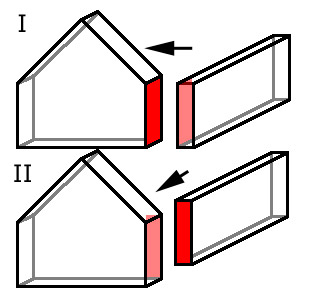
It's obvious how to put the house parts together. Gluing the front onto the side walls (I) looks more appealing than the other way around (II).
Even if you worked very precisely there will be some imperfections, especially at the corners. So try to arrange the parts in the way they match best.Try to use the best parts for the front. If it does not work out, take a knife and rework the parts. The edges will be covered later anyway. Use toothpicks to fix the construction of the walls. Keep an eye on the alignment of the roof, but toothpick fixation is not necessary.
Now we start to glue. Fill a freezer bag sugar icing and cut the corner with a scissor. Take out the first wall and put the sugar icing on the groundplate where the wall should be placed.
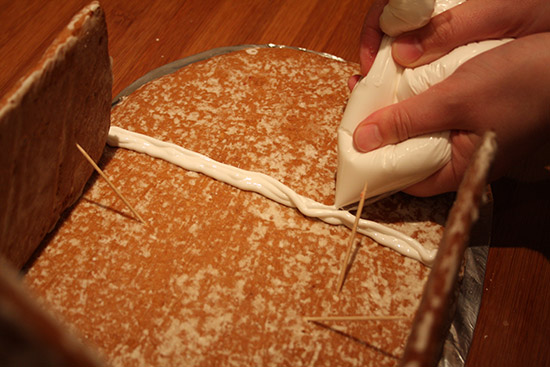
After placing the wall, fix it with tooth picks again. Do so with the next wall and put some sugar icing on the conjunction. Don't be too economically with the sugar icing since it will hold everything together. Continue with the remaining walls. Now the sugar icing has to harden a bit. To avoid hardening within the freezer bag, close the hole and put it in the fridge.
Remove all tooth picks before mounting the roof. Put sugar icing all the way around the walls upper sides and put the roof parts on the walls.
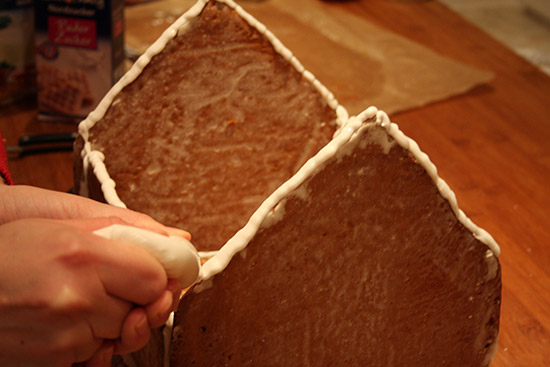
Seal the glued edges from all sides.
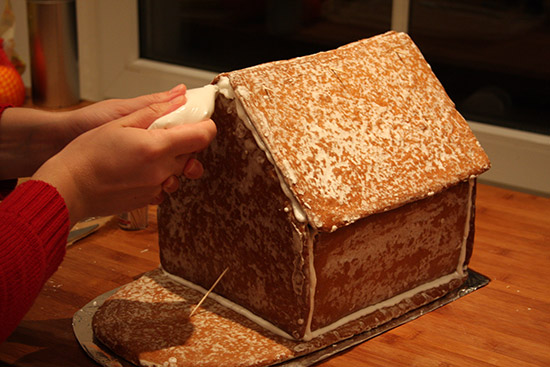
Fix everything with toothpicks and wait until everything is hardened. Meanwhile we can prepare the decorations.
All sweets and bakery producs can be used as long as they are small, sweet and colorful enough:
Jelly beans, small cookies, gingerbread, candy, sugar pearls...
If you prefer the classical approach look out for nuts, almonds, fruit glacé...
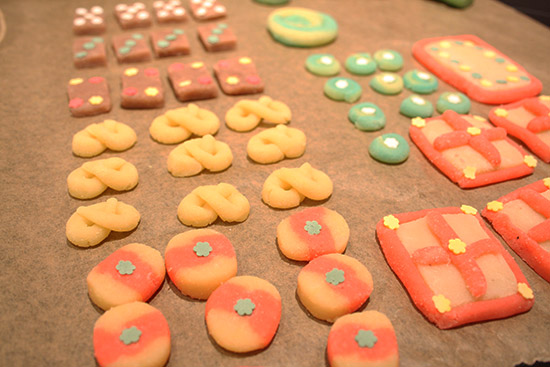
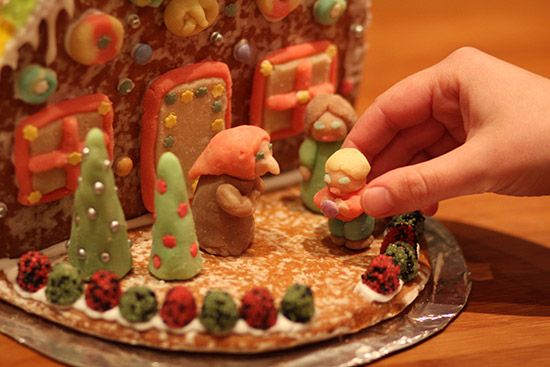
But even the decorations can be made by yourself. All you need is some marzipan or persipan and food coloring. Doors and windows can be created in different ways. With little effort they can be made of marzipan, painted with sugar icing or simply cut out of the walls. Even Hansel and Gretel and the witch can be made. Or any other person you like.
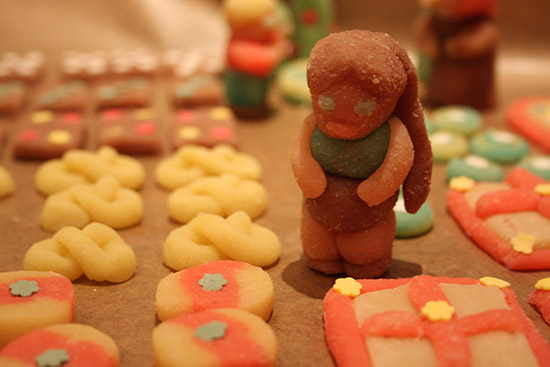
Stick to simple forms for the characters. Everything else will be frustrating.
With the food coloring one can mimic the appearance of other sweets as for example candy, candy canes, gingerbread, pretzel...
You can be creative with the the bought candy, too. Use green jelly beans for a hedge in the front garten, build a snowman from cocos pralines, use cookies as tiles...
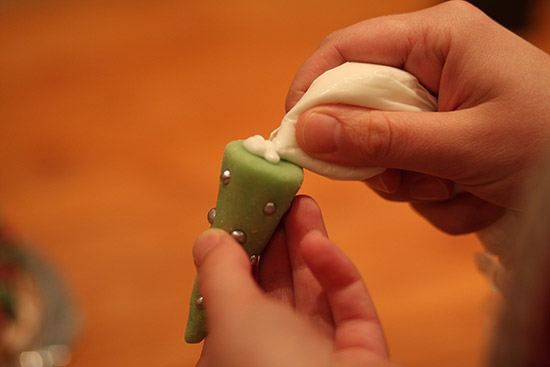
It is very easy to attach the decoration: Put some icing on the bottom side of the candies and push them into the desired position.
Decorate the house first and then the front garden. Otherwise it might be difficult to reach the front side. Try out the arrangement of the characters and everything else in the front garden before glueing it onto the plate.
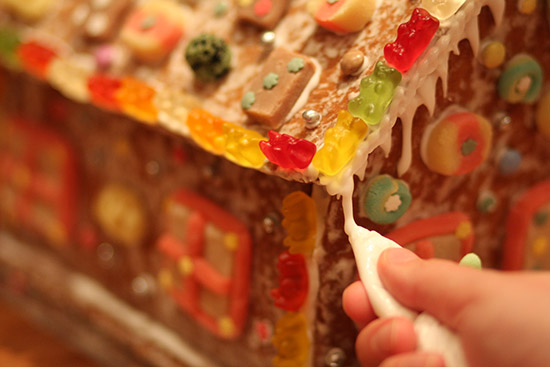
With a little skill you can add some nice icicles
That's it! Let the frosting harden over night and remove all the toothpicks. You can dust the house with powdered sugar, if you want to. Coco flakes look like snow, too.
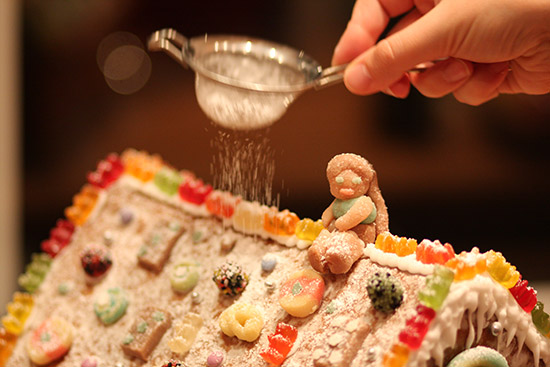
I hope this was fun!