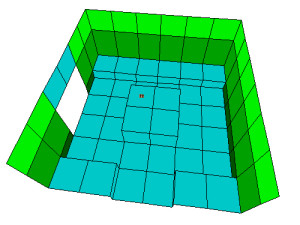
Everyone who attended to building levels, knows that all levels are made up in a block structure.
 The object positioning aligns with the grid of squares too. If
you want to place an object in the level, you cannot place it like you want. It just can be placed on a particular
bottom square where it will be located in the center. Of course the object could be designed to appear at the edge of a
block. While rotating it can be moved to all edges, but not in the center. If you want the object to appear once at the
edge and once in the center of a bottom square, you normally have to copy it in two different objects slots. Well, this
is a little bit involved, but no big deal.
But there are objects where it isn’t possible that easy. Items, for example things that Lara can pick up. Even if you
edit the object to appear at the edge of the square, Lara has to stand up in the center at least to pick it up. But
this is just the level editor and there’s nothing you can do, right?
That’s wrong!
When we remember... it was until TR3. And actually it’s possible with the level editor too. We don’t need extensive
patches or incredible level buildung-skills. Just a little trick.
The basic trick is very simple: you just have to place the item on the wall! Well, actually it isn’t that simple,
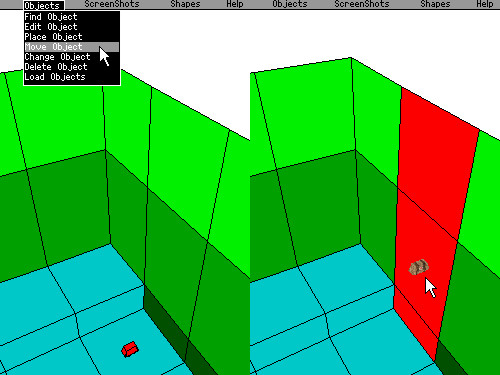
because if you try it with “place object” and click a wall, the object will appear just IN the wall – and in the middle.  So, first of all you place the object on the ground in front of the wall. Now here comes the intended trick. You select
the object and select “move object” in the menue. Now you can move the object to another position inside a room. This is
very useful because all trigger of an object will kept and you don’t have to reset it – what would happen if you delete
and reset it. Anyway with “move object” you just cannot move an object to another bottom square, but also at a wall!

However you should select walls which are at the bottom or on the right in the 2D view. If you’ll try it with the other
walls, the items often will appear somewhere else.
Now you can let the item like this. You can rotate it if you want, that works just as always. Now you have an item
at a wall which you can pick up without a crowbar. This is useful at items which not work with the crowbar: how about
to attach a torch to the wall which you can pick up straight? But to let the pickup work you should insert 3 or 4 in
OCB of course to let Lara make the animation where she picks up something from a podium. 
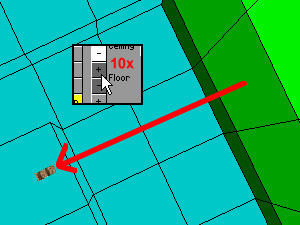
With floor+ or Q in the keyboard you can move the item away from the wall.  If you place an item on the floor, it
will move up. If you place it at the ceiling, it will move down. But if it’s placed at the wall, it will move away
from the wall into the room. If it’s eight times moved, it’s moved one square. This means it can take seven new
positions,
  which weren’t possible at the default placing on the floor. You can move an item through the whole room to
the opposite wall. That’s why it doesn’t matter that it works just with two walls. But you shouldn’t forward an item
out of the room.
If you can’t change the height with Floor+ anymore, how will you adjust the items? You have to do this with the help
of splitting walls.  In the same way as an object placed on the ground can be found always in the center of a square,
an object placed on a wall can be found in the middle of the wall. If you have a wall beginning at level 0 and ending
at the level of 8 clicks, your item can be found in the level of 4 clicks if placed on this wall. If you now lower the
ceiling 4 clicks, your whole wall will have a height of 4 clicks and your item can be found in 2 clicks height. That
would be the right height for a low podest (OCB 4). Of course you can upper the floor to move your object higher.
Normally you use the splitting of the wall for texturing and in that case you might need a different splitting of
the wall than for placing your object in the right way. Also with that way you can’t bring your item down to the ground.
That’s why a second trick is needed ![]() the wall behind the wall.
the wall behind the wall.
First of all make your room two squares bigger (right or/and down)  and create a new row of walls in the inside of the
room. This is going to be our new visible wall. You can use the outer wall for placing your objects by adjusting the
ceiling and floor in the right height you need for your item.
That’s it, I hope this tutorial was helpful and I hope in the future we will not see just laid down items in the middle
of a passage, but as well a little bit hidden in the corners.
Happy building!
